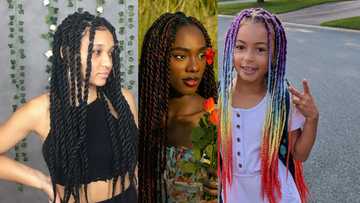
Types of braids and braids hairstyles in Ghana
Braids is an embraced hairstyle by the Ghanaian ladies for making them rock. The best bit about braids is that they will always protect your natural as well as your curly hair. This means that if your hair is used to chemical ingredients, braiding your hair will give it a break. Right? Those hairstyle geeks and the ladies looking for inspirations, this article is for you. This is because it will share with you the types of braids in Ghana and how to do them.

Braids can suit all ages black hair ladies and men including the toddlers from the cornrows, goddess, to Ghana braids. Have in mind that if you go for the long braids, you will take longer hours to do them although you will enjoy styling your braids in different styles. If you go for the short braids, you will definitely take a short time to mend them as well as rock with that bob style. For a little princess, a simple and cool braid hairstyle will be the best for her to make her more comfortable. This is the reason why most mothers prefer short braids for their toddlers.
Types of braids for black hair
The types of braid you decide to have on your head will determine your look in the next few days. You can spice up your look with a unique metal ring, a beautiful flower, wooden beads, or a kerchief with either the African fabric or the polished cotton tunic. this article has compiled different types of braids for black hair. go through it and decide which one will best suit you.
1. Cornrow braids Ghana hairstyles
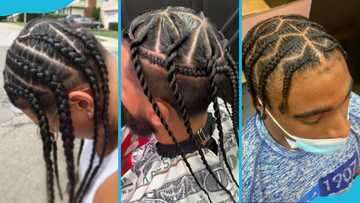
Most Ghanaians refer to the cornrow braids as invisible cornrows. There different types of cornrows from the thick, thin, long, short, but all in all it is you to choose if you want a dramatic or a natural look. Of course, most of the young girls will go for the dramatic look; as they want to look awesome as well as unique with more strands. Those girls who love bright colors hairstyles on your head, you have not been left out and you can go for the kanekalon colored braids like white, green, red, purple, yellow, or combination of the colors.

Follow the steps careful on how to do the Ghanaians cornrow braids hairstyle.
Step 1 - Hydrate your hair
Choose a hair cream best for the black hair and apply it paying attention to the roots. This is because the cream will make your hair not to dry up and also hydrate your scalp.
Step 2- How many strands and cornrows will you need
If you want more strands, the more the braids you will need and the more the cornrows the more the needed braids. Create your preferred sections by parting your hair keenly and neatly with a comb. Have in mind that you part your hair according to your preferred cornrows.
Most ladies prefer to start the parting from the center of their head as they find it easier to make the cornrows equal. Commence with either of the equals and hold the other half with a clip.
Step 3 - Separate your weaving hair
For a natural look, 12 strands are enough, but a dramatic look, 24 strands or more is what you need. The good thing about cornrows is that the effort in doing them is worth it and that is the reason you need to keep doing them without losing hope.
Have in mind that the strands get a little thicker from the last one that you picked. Arrange your weaving hair well so that when you start doing them off you won’t have a hard time.
Step 5 - Begin to create the cornrows
Pick 2-3 stitches, divide it into 3 small sections, and begin to make your first cornrow. Do you know how to cross the stitches? If no, begin by crossing you left side section over to your middle section keenly and strongly. Do the same to your right section; keenly and strongly crossing it to the middle section.
Step 6 - Add the strands
Which is the thinnest strand among the 3? Well, fold and take that thinnest strand around the back of your head and ensure that the looped part faces the hairline; the two tails hanging at the back of the head. Tuck the middle section into the loop the strand being in between the hair (real) and the scalp.
If you carefully did that, add the left strand to the other left section of the braid. Do the same to the right side; adding the right strand to the other right section.
Step 7 - Continue with the braiding
Always try to make your crosses strong and tight so that your cornrows can be neat. Continue with the braiding; hold together the left side of your hair and the left section of the braid. Do the same to the right section.
You picking the strands, you should pay attention to the thickness you want for your cornrow. If desired you can use more cream to smoothen your strays and be more unique and stylish as you make your braids.
Step 8 - Thin your half bottom strand
Go for the long or the short braid cornrow and have that desired length of your choice. Once you reach the bottom half of your braiding, make sure that you leave it fast and continue reading on how to cut the strand to make it thin.
Do you have a pair of scissors? Well, you need one. Hold your pair of scissors correctly and point it parallel to the tip of your strand; ensure that tip is facing upward before you commerce on cutting it. Why do you have to make the strand thin? When the strand is thin, the braid will maintain its thickness.
Step 9 - How to tie the braid
You can tie the braid with either a clear or a black elastic and ensure you wrap it well around the braid end. You can tuck the left tail after wrapping it well for a few times under the elastic. Most ladies prefer the tying rather than heat sealing.
Step 10 - Finish up the rest of your cornrows
Braid the other cornrows the same way and ensure they are neat, tight, and strong. You can give yourself breaks as it is absolutely normal to feel exhausted.

Once you finished, use your pair of scissors to trim the hairs that are sticking out and smooth your hairline with a soft bristle brush. Am sure your hands are tired by your efforts are worth it. Right? Rock with your cornrow hairstyle at any occasion and you will completely fit in.
2. Twist braids hairstyles
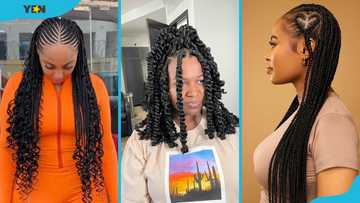
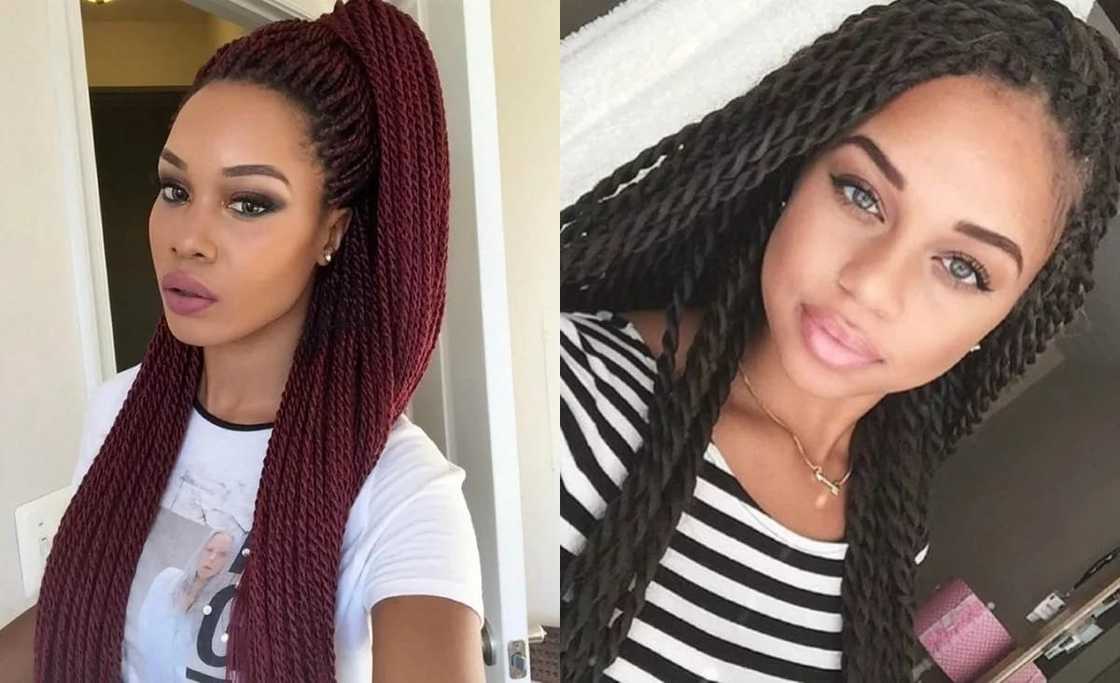
The Senegalese twist braids are so beautiful and you have to learn to do them by yourself. How many ladies are interested in learning? Well, if interested read on and be ready with a clip, a retail comb, hair cream to hydrate your hair, and finally your efforts. Fact remains that they will take long to be made, but you will definitely love the end results. Here is how to do your twist braids.
Step 1 - How long is your hair?
If your hair is lengthy, you can go for the natural hair braids or the long synthetic hair extensions. For the short hair girls you have no choice but do your Senegalese twists with the hair extensions, which is perfect because you can use either the long or the short one.
The hair extensions are either the yaki braiding hair (Toyokalon) or silky braiding hair (Kanekalon). If you want the long braids, then purchase 5-7 extensions. This is because they are fewer and the size of your twists will determine how many packages you will need. The short braids are a little bit more and therefore 4-5 packages are enough. In this case, let us use the Marley twists because of their good quality.
Step 2 - Open your extension package
Open your first package and apply a cream oil on it to make it easier for you when separating the strands for braiding. Hold them tightly with one of your hands and use the other hand to separate it into based on your preferred size of the sections. Separated each of your separated sections into two halves and fold each to form a ‘U’ shape. Do the same to 4 of your extension packages and you will add more if they are required. You can even seek your friends help.
Step 3 - Wash and dry your natural hair
Senegalese twist braids can take you for 3-4 week and therefore you should make sure your hair is clean. Use a shampoo to wash it, apply conditioner (leave it about 15 seconds to take in the conditioner) so that you comb it smoothly, and dry it using a blow dry. Have in mind that you should not apply oil on your hair so that the twist braids can be tight, strong, and neat.
Step 4 - Begin parting your hair
Most ladies prefer to twist their braids starting from the back of their head. This is because it will make it easier for them to make the separation more to equal.
Use you comb to separate a small section from you back of at least 2.5cm, comb it, and split it into sub-sections with your hands.
Step 5 - Begin to do the twisting
If you want go for the natural afro twist braids styles, separate your sub-section into 2 halves, coil them, and start twisting from the scalp tightly, slowly, and strongly. If your using the extension hair, take your ‘U’ shaped section and bend it well on your split sub-section, coil them, and start twisting. Continue with the twisting and seal it.
How do you do the twisting? Well, overlap once your right-hand section with your left-hand section, coil the strands, to the right, and bring the overlapped section under. Do that keenly once more and then twist the rest; make sure your tighten the strands well and if you do it correctly there will be no need to seal it immediately.
Step 6 - Finish up with the twisting
Now that you know how to do the twisting, we are sure you can continue and finish up the other split sub-sections. Right? Separate another section of 2.5 cm and do the same until you finish. Take short breaks because it is normal to feel exhausted for over-working your hands joints.
Step 7 - Seal your twists
Once your done, you will need hot water to seal your twist braids. Heat water with either a heater or a saucepan until it boils. Deep the ends of the afro twist braids carefully for about 15 seconds. If you use short extensions, you can seek help from a friend. Take a towel and dry the twists ends.
If your not comfortable with using hot water, you can either seal them with an elastic band or make a small know at the end of each twist braid.
Step 8 - Apply your twist ends with oil
Sub-merge your twist braids ends into your olive oil for hair or apply your preferred oil gently using your hands if you used hot water to seal it. This is to avoid the ends from drying out.
Step 9 - How to care for afro twist braid styles
Twist braids require a minimal maintenance and this article will also share with you on how to care for them.

Use a shampoo to wash your twist braids after 2 weeks. This is because washing them often will make your twist unravel fast. Dry them well using a towel.After drying, apply oil like coconut on them beginning from the scalp. Spray it if desired.Always use your old stockings, a bandanna, a silk, or any satin scarf to tie your Senegalese twist braids before sleeping.
3. Crotchet braids in Ghana
Crotchet braids are the best for those ladies who are impatient to take 2-3 hours to make their hair. Are you among them? Well, you don’t have to worry because this article will provide you with how to do crotchet braids step by step. All you have to do is to follow each step carefully and your efforts will make worth it as the end results will be pleasing.

Step 1 - Purchase your crotchet braids
Do you have your crotchet braiding hair? Well you can also use Marley hair or dreadlocks braids to do them and 1-2 packs will be enough; based on the number of the crotchet braids per pack.
Step 2 - Make small cornrows braids
Before you start to make the cornrows, keep in mind that your hair needs to be healthy and to be maintained. Wash it using shampoo, apply conditioner to make it healthy and leave it for around 5 minutes. By then you will notice that you will be able to comb your hair smoothly using a toothed comb. Right?
Part your hair carefully at the middle of your head to the bottom and use a clip to tie one of the halves. Start off with one of the halves and subdivide it into small equal sections having in mind that the cornrow are for the crotchet braids. Begin with your first section and split it the front hair into 3 strands. Overlap the left strand to the middle strand and the right hair to the middle strand. Continue with the braiding until you reach at the bottom of your cornrow. Continue with that trend until you finish up with all the sections on both halves. We know you are a little tired, take a short break, and continue with the next step.
Step 3 - Join your crotchet braids to the cornrow Braids
Open your crotchet braids pack and pull a strand. It is best if you start crocheting from behind to the front. Do you have a crotchet latch hook? Well, you need it in this step. Push the hook from the left/right side of your cornrow braid; pull the crotchet latch hook to the other side right/left. Hook it with one strand of your crotchet braids and pull it.
Step 4 - Continue with the crocheting
Do that to all the crotchet strands and make sure that you arrange them well to cover your cornrow strands. It will take a very short time to complete the rest.
Step 5 - Seal your crotchet braids
You can use an elastic to tie the ends of the crotchet braids or make small knots at the ends. We know you look perfect. Right?
Step 6 - How to maintain your crotchet braids
For your crotchet braids not to unravel fast, you need to maintain them. Most ladies refer to this hairstyle as a winter style. This is because the crotchet braids protect your natural hair from getting dry as well as brittle. Here are tips on how to maintain your crotchet braids.
Clean your scalp on weakly bases with a shampoo and make sure they dry. Apply conditioner on your crotchet braids. Oil your scalp. Make sure you sleep with a scarf, a bandanna, or your old stocking.
READ ALSO: Top 10 latest cornrow rasta styles for women
4. Kinky Braids
Types of braids for black hair will never lack even in the future and the interesting bit is that they give you that perfect look that you have always wanted. The kinky braids are standing out this year and we thought of sharing with you on how to make them.

You can either go for the short or long kinky twist hairstyle. The long kinky braids will take to long to be made though it will give room for you to style it into any style desired. For the short kinky braids, you time and money spent will be saved compared to the long ones.
Step 1- Prepare your hair
You need to wash your hair with a shampoo, apply conditioner, and leave it for about 15 seconds. Comb it with a toothed comb and finally dry it with a blow dryer.
Step 2 - Purchase the Kinky extension
Purchase enough kinky extension packs, open it, and prepare it by dividing it into sub-sectioned lock of hair.
Step 3 - Begin to do your Kinky twists
Follow the same steps on twisting that the article showed you during the Senegalese twists and you will definitely have that look that you have always wanted.
How to style braids
There are so many ways that you can style your braids from the Senegalese twists, Kinky braids, to the box braids as long as they have the right length. This is because the bulb braids are perfect when left unstyled; either way they are short and styling them is the last thing you can think off.

Do you love bead on your braids? Well, the Fulani braids are perfect for those girls who are in love with the African braids. If you are truly proud of being an African then you should embraced the African hairstyles. Right? This article will present to you the latest hair braids styles that will make you rock this season on that event or occasion.

Half up, half down Rasta braid styles
It is a simple yet a classic braid style that leave you having that expensive and trendy look. Grab a small section of your long braids and make a Dutch braid. Wrap the Dutch braid to the other side of your braids and secure it with a bobby pin. This latest braid style looks perfect as it keeps your braids off your face.

READ ALSO: How to style braids step by step (pictures & video)
Top knot bun braids style
Arrange your braids properly and grab the half-middle section. Use an elastic band to tie and make a ponytail so that you can have an easy styling time. Split your ponytail into two for an easier and a perfect wrap. Grab your first half and wrap it round to the other half from the back to the front then tuck it to the elastic band. Do the same with your other half; wrap it carefully and tightly. Once you done styling, adjust it for a more comfortable feel, and finally secure it with bobby pins.

It is very simple and everyone can do it right? Style your long braids and you will fall in love with your hairstyle more.
Source: YEN.com.gh

