How to use Microsoft Access
Microsoft Access is a program for creating and managing a database. It allows a person to edit as well as maintain a database. A database is a collection of related information packaged together. It may be contact information, notes, fundraising information or company information. Storing information in a database reduces the risk of losing it. There are several programs curated for creation and maintenance of the database. Among them is Microsoft Access. It is a visual program suitable for both small and large projects. It is great and incredible for a person who wants to perform data entry.

Source: UGC
Here we have easy steps on how to use Microsoft Access. Read on and learn how to store your information for analysis, reference, and reporting.
How to use Microsoft Access step by step
We have to create a new database first. Here are the steps:
1. Go to the file tab, click it, and then select new.
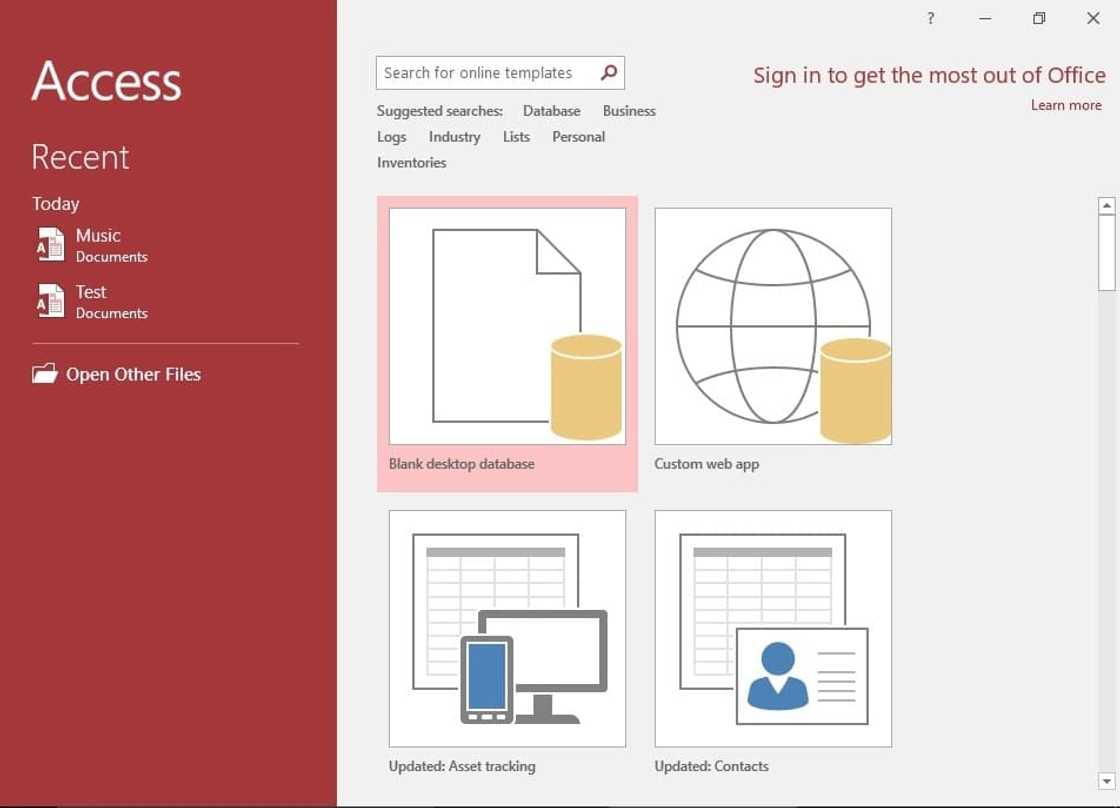
The database that you will create will contain your data in various forms. In this case, you are free to create a blank web, a blank database, or even pick any option from the templates available.
READ ALSO: ADOM FM | Listen Free Internet Radio Online
So, what is a blank database? It is referred to as a standard access database, which is excellent for local usage. A web database is designed in a way that is compatible with the publishing tools for Access web. If you create a blank database, one table will be created as well. A template is usually a pre-built database that is designed for a broad range of usage. Therefore, if you are not interested in spending plenty of your time putting database structure together, you should opt for a template.
2. Name the database.
We believe that you have already selected your preferred database type. Now, give the database a name, which should reflect its use. This is so that as you work on other databases you would not get confused. Enter your preferred database file name in the ‘File Name’ box. Now, choose ‘create’ so that you can generate a new database file.
3. Add and determine the structure for the database.
Are you creating a blank database? Then you have to think of a great way to organize the data so that you are able to add an appropriate structure. Here are different ways to interact with and format the data in Access.
Tables – many people prefer using tables as the main way to store data in a database. They are almost similar to using Spreadsheets in Excel. This is because as data is usually organized using rows and columns, the process of importing your data from excel and other programs of spreadsheets straightforward is easier.
Reports - Reports display as well as summarize your data in the database. They are used for returning specific questions, answers, as well as analyzing data.
Forms – They are the means of adding data to the database. You can add your data directly to your database in tables. If you use forms, your data entry will be more visual and quick.
Queries – You use Queries to retrieve and filter the data, display entries that are from multiple tables, and to create and update data.

Source: UGC
4. Create the first table.
A person who is commencing with a blank database would definitely be starting with a completely blank table. You can enter the data into the table by copying and pasting from a source or by typing the data manually. When you save the table, a pop-up dialogue box will appear, prompting you to name the table. Use the name that correlates with the table, for easier reference.
READ ALSO: ACCRA FM | Listen Free Internet Radio Online
5. Import your data from other sources.
In case you are importing it from a location/supported file, set Access; it will help you grab all the information you want and add it to the database. Here is a vital way for data grabbing from a web server or another shared resource.
Click the tab for ‘External Data’ and then select that file type you want to import. You will see the ‘import and link’ option. Note that ODBC is the abbreviation for Open Database Connective, which includes databases like SQL. Now, navigate to your data location; in case it is on the server, you will have to offer your server address. When you proceed to your next Window, click ‘ok’ to the ‘Specify how and where you want to store the data in the current data.’ Keenly follow the steps provided to import the data carefully.
6. Now add more tables.
Different records should be kept on different databases for smooth running. To create a new table, click on the table button at the home tab. Enter the information just as you did in the first table.
7. Set the table relationship.
How does this work? Well, each of the tables should have 1 primary key, which should be very unique with each of your entries. The Access creates ID column, which increases for each of the entries by default, therefore, it is advisable to set it as your primary key. Did you know that tables can have foreign keys as well? Such fields are usually linked to other tables in a database in which they should contain exactly the same data. Note that using relationships is very vital in keeping the data readable, consistent, and efficient.
You should check for the relationships section and click that button. It is located on the tools bar under the 'Database tools' tab. Doing that will open a new Window with all your database tables overview. You will also notice that every field will be underneath its named table. Have in mind that you create the foreign key field before creating the relationship.
8. Drag the field you require to use as your foreign key
Drag that field and drop it to that foreign key you created. Now click on ‘Create'. A Window appears to set your field’s relationship. You will automatically see a line appear between two tables that connect the fields. For keeping accurate data, check that box to ‘Enforce Referential Integrity’ while creating your relationship.
9. Making Queries.
What are Queries? They are actions that allow someone to quickly view, edit, as well as add data to a database. Queries are available in different kinds and types, such as, creating simple looks and new tables that are on the existing data. This means that they are vital tools used to generate reports. You can break the queries into two; action query and select query. Action queries add, delete, and edit data from your tables, while select queries make calculations as well as pull data from the tables.

Source: UGC
READ ALSO: How to Apply For Us Visa Online
10. Create basic ‘Select query’ using the 'Query Wizard'.
For you to create a basic ‘Select query,’ you will have to use Query Wizard, which will walk you through the simple steps. If you want to access Query Wizard, click on the ‘Create’ tab. By doing that, you will definitely have a clear view of your specific fields that are from your table. Select those you would want to pull out and click 'finish' after the process.
To design your own query according to your preferences, you will have to open ‘Query Design’ tool. To begin, click ‘Create’ tab then select on 'Query Design'. The criteria will narrow down the select query and display only the information you will require.
When the ‘Show Table’ box opens, double click your tables, which you require to run your query on and then click ‘Close’.
Which fields do you want to retrieve? Name them; double click each in your table and add the query. Note that those fields will definitely be added to your Design grid.
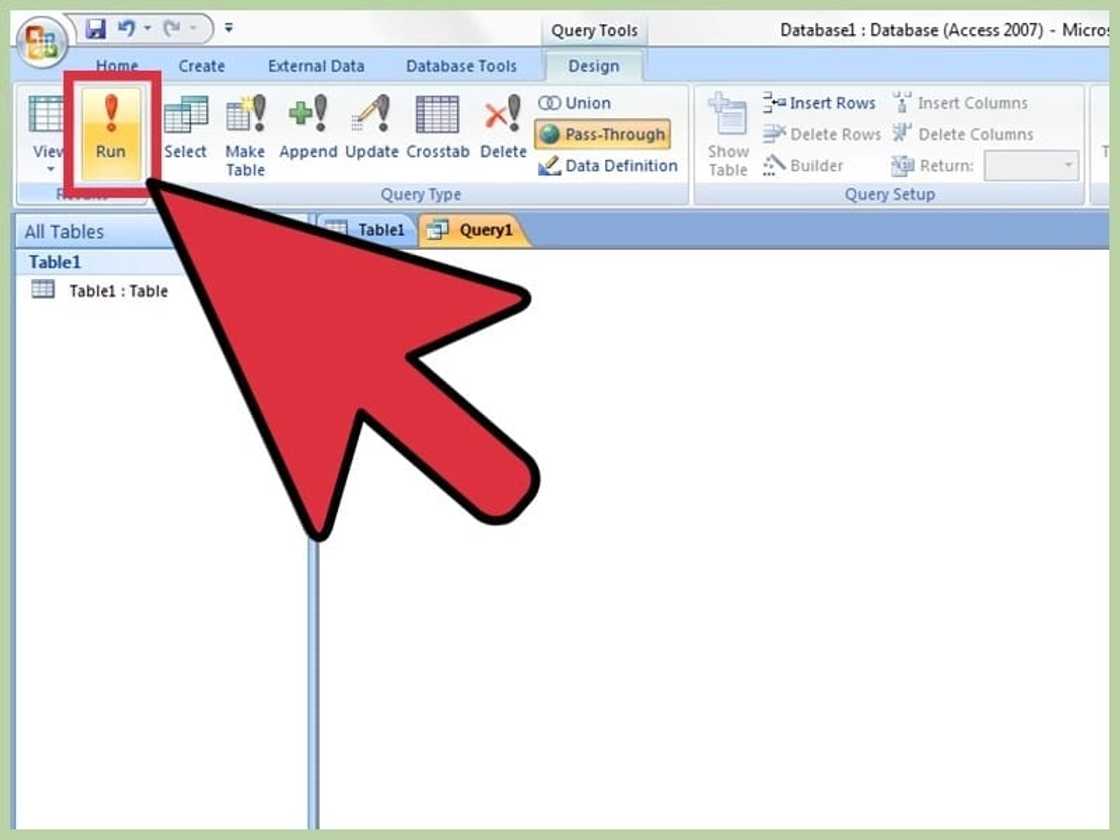
There are several kinds of criteria such as functions and texts. Now click ‘Run’ so that you can view the results. Where is the ‘Run’ button located? Well, check it on your ‘Design’ tab. Have in mind that the query results will automatically be displayed at your Window. Now press ‘Ctrl + S so that you can save your query.
Using Microsoft Access to create ‘Select Query’ with parameters
Here is how to create ‘Select Query’ with parameter:
Open the ‘Query Design tool - the parameter query is vital because it allows one to specify what they need to retrieve whenever the query is running.
Create ‘Select Query’ to specify your tables- double click the field in your table overview, you will be adding fields that will be retrieved in your query.
READ ALSO: Latest News from GHANAWEB - Read Now on YEN.COM.GH
Add a parameter to your criteria section - for you to see the text that is inside those brackets, you will have to run the query.
Make multi-parameter queries - For you to create custom for the query results, you will have to use multiple parameters.
Click ‘Create’ tab, then select ‘Query Design. Queries are used for pulling specific data from the existing tables as well as creating new table with the data. In case you are in need of sharing some parts of the database or creating some forms for the database subsets, this will be helpful to you.
Select your tables (that you are in need of pulling data from) by double clicking on them. If you find it necessary, you can do the pulling from the multiple tables. After that, select those fields that you are in need of retrieving your data from by double clicking on each and it will automatically be added to the query grid.
Test the query so that it can return your required results. You should always consider running your query so that you can be sure that it will pull the correct data even before creating the table. Now, adjust the fields as well as the criteria until it gets your required data.
After all that, save your query. How? Press ‘Ctrl +S’ to save your query. You will notice that it will appear in the navigation frame, which is at the top-left side of the screen. Now click on that query, select it, and then click on ‘Design’ tab.
Click ‘Make Table’ button that is in your ‘Query Type’ group. Now you can click ‘Run’ button.
To create the append query, open the previous query that existed and click ‘Append’ button that is in the ‘Design’ tab. Now change your criteria of the query so that they can properly match with what you require to add. The next step is to set where the data should be appended and then click ‘Run’ that is on the ‘Design’ tab.
How to use Access database to create and use forms
The first step is to select that table, which you are creating a form for. What are forms for? They help one to see their data easily and quickly create new records or even switch between other records. In simple words, forms are vital for the extended data entry. This is because they are easier to work with compared to tables.
Check the ‘Create’ tab and click on the ‘Form Wizard’ button, then follow the prompts to create your form. Once you are done, navigate the new form by clicking on ‘datasheet’ button so that you are able to use the form. Note that you should remember to save your form when you finish.
MS Access tutorials on how to create a report
For you to create a report, you have to first select the query. The reports are vital for they allow one to easily display data summaries. Click ‘Create’ tab and select your preferred type; you can create a blank report, a custom report or use a report wizard to display the information that you want to pull.
Learning how to use Microsoft Access is easy and time saving. Right? We believe that the article was helpful to you. Always remember to save your work for future reference after you are done. The Microsoft Access for dummies tutorial and videos are numerous, all depending on the kind of database you want.
READ ALSO: How to make money in Ghana in 2018
Source: YEN.com.gh


